To legally use a 5.8GHz video transmitter in the U.S. you need at least a Technician Amateur Radio license. It is not a hard test, but I wanted some study aids to make sure I only had to take the test once.
A little bit of searching on Amazon led me to The No-Nonsense Technician Class License Study Guide (2014 edition): For tests given starting July 1, 2014 [Kindle Edition] for a very reasonable price.
It is a very good book covering only what you need to know to pass the test without a lot of fluff that many of the other study books include.
I rate this book a 10 out of 10 and recommend it to anyone who wants to quickly learn what it takes to pass the Technician license.
P.S.
I passed my test only missing 2 questions after reading this book twice and using an iPhone app to take around 100 practice tests.
I really love the characters and world that Larry Correia has created with the Grimnoir Chronicles and Bronson Pinchot has done an amazing job bringing them to life.
I didn’t think there was much new ground covered here, but Tokyo Raider is a solid addition to the series.
From the publisher:
With the Japanese Imperium at war with the Soviet Union, and the United States watching cautiously on the sidelines, Second Lieutenant Joe Sullivan of the U.S. Marines is sent on a dangerous mission to Tokyo. The Russians have Summoned a demon of epic proportions to attack the city, and all that stands in its deadly path is an untested Japanese super-robot. Now, Joe is at the controls, his gravity-spiking Power at the ready. But that is one huge, mean Demon….
I love me some Veronica Mars, it was one of the few non-sci-fi shows I watched in real time. Kristen Bell and her friends just work for me.
Kristin Bell narrates the audiobook and does an amazing job, I felt like I could hear the actors from the show laughing about her impersonations of them. She really nails some of them and gets close enough with the others that it made the story even better.
The story written by Rob Thomas and Jennifer Graham is a solid one that could have easily been of handful of TV episodes. The Veronica Mars vibe is alive and well.
From the publisher:
The first book in an original mystery series featuring 28-year-old Veronica Mars, back in action after the events of Veronica Mars: The Movie. With the help of old friends – Logan Echolls, Mac Mackenzie, Wallace Fennel, and even Dick Casablancas – Veronica is ready to take on Neptune’s darkest cases with her trademark sass and smarts.
I am working on a personal side-project for some friends and decided to build it using Node, Express, Mongo, and Passport.
About the time I was working on the database architecture I received a coupon via email for the Udemy course “All about Node.js” taught by Sachin Bhatnagar. The full price for the course is currently $150 but it comes up on-sale from time-to-time and coupons are often available.
The course is 64 lectures with 8 hours of video and a handful of quizzes. It took me 3 weeks to work my way through all of the lectures as I was also reading a couple of books on Safari Books Online and Learn All The Node http://www.learnallthenodes.com/.
Sachin’s class is great; the lectures about using Amazon’s CloudFront and EC2 alone are worth the full price of $150. He is very articulate, easy to understand, and does a great job breaking complicated systems into easy to digest lessons.
From the course description:
“My intent is hand hold you all the way from writing your first NodeJS app to deploying production level apps on the cloud.”
What am I going to get from this course?
Over 64 lectures and 7.5 hours of content!
Build High Performance and Scalable Apps using NodeJS
Use NodeJS Streams to write a Web Server
Use the Node Package Manager (NPM) for managing dependencies
Use the Express 4 Framework for building NodeJS Apps
Use the Hogan Templating Language
Understand MongoDB as a NoSQL Database
Create & Use MongoDB Databases using services like MongoLab
Create Realtime Apps that use Web Sockets
Upload & Resize Images using NodeJS
Integrate Authentication using Social Media Sites like Facebook
Structure the NodeJS app into modules
Create and Deploy EC2 Cloud Server Instances on Amazon Web Services
Create and Use Amazon’s S3 Storage Service with NodeJS
Use Amazon’s Cloudfront Service
Using Amazon’s Elastic IP
Configure Security Groups, Ports & Forwarding on Amazon EC2
Deploy a NodeJS app on the EC2 Instance
Deploy a NodeJS app on Heroku
Deploy a NodeJS app on Digital Ocean
Install & Deploy NGINX as a Reverse Proxy Server for NodeJS Apps
Configure NGINX as a Load Balancer
What is the target audience?
Web Designers & Front End Developers who wish to extend their knowledge of Javascript for building high performance network applications.
Software Developers who want to build high performance network applications.
Absolute beginners with basic knowledge of HTML, CSS and Javascript, wanting to upgrade to professional Web Development and Building Web Apps.
PHP, ASP.net, Perl, Java & Ruby coders wanting to leap onto the Node.Js bandwagon.
Anyone who wishes to get hands-on training with setting up an Amazon EC2 Instance with a host of other services like Cloudfront, Elastic IP and S3
Anyone who wishes to get hands-on training with deploying a NodeJS app on the cloud
Computer Engineering students
Tech Entrepreneurs who want to get their hands down and dirty with Web Coding & App Development.
Anyone who wishes to stay on the forefront of technology!
I rate the Udemy Course: All about Node.js a 10 out of 10 and highly recommend it to anyone who wants to learn Node.js and its surrounding technologies and frameworks.
Changing pace yet again I decided to binge on some Cory Doctorow goodness. If you don’t know who he is check out Cory’s Wikipeida entry, he is an interesting character. His politics are about as far from mine as they could be, but he is a really great storyteller.
You can download and read Cory’s books for free and even remix, mash-up, re-write, and mangle the contents to your hearts content following the Creative Commons Attrivutions-Noncommercial-ShareAlike license. You can get his books at Craphound.com.
For The Win is an attractive story to me because I enjoy playing video games, have played a lot of different MMOs in the past and look forward to playing them again with my son when he is old enough. I also really like the international viewpoints the story presents, the U.S., China, India, and Russia all come together.
I found the book to have a lot of lectures in it, at times I felt like I was being treated like a child in a schoolroom sitting at one of those little desks with the attached chairs. I tried to tune a lot of that out because the story itself is really good, the characters have a lot of depth and I found myself rooting for most of them. This is a really good story if you can get through the lectures.
From the publisher:
It’s the twenty-first century, and all over the world, MMORPGs are big business. Hidden away in China and elsewhere, young players are pressed into working as “gold-farmers,” amassing game-wealth that’s sold to Western players at a profitable markup. Some of these pieceworkers rebel, trying to go into business for themselves—but there’s little to stop their bosses from dragging them back into servitude. Some of them, like young Mala in the slums of Bombay—nicknamed “General Robotwallah” for her self-taught military skill—become enforcers for the bosses, but that only buys them so much.All the way over in L.A., young Wei-Dong, obsessed with Asian youth culture and MMORPGs, knows the system is rigged, knows that kids everywhere are being exploited. Finally, he and his Asian counterparts begin to work together to claim their rights. Under the noses of the ruling elites, they fight the bosses, the game owners and the rich speculators, outsmarting them with their street-gaming skills. But soon the battle will spill over from the virtual world to the real one, leaving the young rebels fighting not just for their rights, but for their lives…
I rate For The Win an 8 out of 10 and recommend it to any Cory Doctorow or gaming fan.
Freedom is book 2 in the Daemon series of novels. It continues right where Daemon left off, more of the same.
I enjoyed Freedom, there are a lot of subplots in it that I really enjoyed, but it is not as good as Daemon and I found the end wanting. I would like more, I would like more of the subplots to be wrapped up. I just want more.
In one of the most buzzed-about debuts of 2009, Daniel Suarez introduced a terrifying vision of a new world order, controlled by the Daemon, an insidious computer program unleashed by a dying hi-tech wunderkind. Daemon captured the attention of the tech community, became a New York Times and Indie bestseller, and left readers hungry for more.
Well, more is here, and it’s even more gripping than its predecessor. In the opening chapters of FreedomTM, the Daemon is firmly in control, using an expanded network of dispossessed operatives to tear apart civilization and rebuild it anew. As civil disorder spreads through the American Midwest, former detective Pete Sebeck, now the Daemon’s most influential yet reluctant-operative, must lead a small band of enlightened humans in a populist movement designed to protect the new social network. But the private armies of global business are preparing to crush the Daemon once and for all.
In a world of conflicted loyalties, and rapidly diminishing human authority, what’s at stake is nothing less than democracy’s last hope to survive the technology revolution.
I rate Freedom a 6 out of 10 and recommend to anyone who read Daemon.
I don’t remember how this series by Daniel Suarez came to my attention. It could have been as simple as the title of the first book, “Daemon”, or my proclivity for techno-thrillers that get most of it right.
I burnt myself out reading Jack Campbell space battles one after another for a couple of months and needed a break. Daemon is about as far away from The Lost Stars as I could get.
Daemon is a great story of a madman who leaves behind a legacy of malware that has infected thousands of machines around the world holding corporations and governments hostage.
I really enjoyed this book, the pacing is good, the characters are believable, and the technology is pretty sweet. Suarez takes many liberties with the details of the technology, but they all worked for me. The security issues that are highlighted by the author don’t really bother me that much, apparently many people find it controversial, it just feels like a near-future reality with better internet.
Daemon brings readers on a harrowing journey through the dark crawl spaces of the modern world. It’s a cutting-edge high-tech thriller that explores the convergence of MMOG’s, BotNets, viral ecosystems, and corporate dominance—forces which are quietly reshaping society with very real consequences for us all.
It all begins when one man’s obituary appears online…
Matthew Sobol was a legendary computer game designer—the architect behind half a dozen popular online games. His premature death from brain cancer depressed both gamers and his company’s stock price. But Sobol’s fans weren’t the only ones to note his passing. He left behind something that was scanning Internet obituaries, too—something that put in motion a whole series of programs upon his death. Programs that moved money. Programs that recruited people. Programs that killed.
Confronted with a killer from beyond the grave, Detective Peter Sebeck comes face-to-face with the full implications of our increasingly complex and interconnected world—one where the dead can read headlines, steal identities, and carry out far-reaching plans without fear of retribution. Sebeck must find a way to stop Sobol’s web of programs—his Daemon—before it achieves its ultimate purpose. And to do so, he must uncover what that purpose is…
I rate Daemon an 8 out of 10 and recommend it to anyone who likes techno-thrillers or sci-fi.
This is the Raspberry Pi book I have been looking for. Instead of trying to push some advanced scripting language or Linux distribution, this book shows you how to use the most widely used distribution, Raspbian, and good old Bash scripts to do useful things with a Raspberry Pi.
Now 3 years old the lessons in Learn Raspberry Pi still hold up. Raspbian has been through some major updates and the new Model A+ and B+ computers have added to the Pi’s capabilities, but the Linux/Unix commands, SSH and VNC techniques, network information, Web Server installation (LAMP), and a decent chapter covering compiling XMBC on your Pi.
This book does not cover any topics in depth, but it includes enough information to give you an idea of what to enter into Google to find out more. This is one of the greatest features of Linux and the Raspberry Pi, once you know what to search for, there is more information available for free. The community is made up of millions of people from all over the world that want to share what they have learned and what they have created.
From the publisher:
Learn Raspberry Pi with Linux will tell you everything you need to know about the Raspberry Pi’s GUI and command line so you can get started doing amazing things. You’ll learn how to set up your new Raspberry Pi with a monitor, keyboard and mouse, and you’ll discover that what may look unfamiliar in Linux is really very familiar. You’ll find out how to connect to the internet, change your desktop settings, and you’ll get a tour of installed applications.
Next, you’ll take your first steps toward being a Raspberry Pi expert by learning how to get around at the Linux command line. You’ll learn about different shells, including the bash shell, and commands that will make you a true power user.
Finally, you’ll learn how to create your first Raspberry Pi projects:
Making a Pi web server: run LAMP on your own network
Making your Pi wireless: remove all the cables and retain all the functionality
Making a Raspberry Pi-based security cam and messenger service: find out who’s dropping by
Making a Pi media center: stream videos and music from your Pi
Raspberry Pi is awesome, and it’s Linux. And it’s awesome because it’s Linux. But if you’ve never used Linux or worked at the Linux command line before, it can be a bit daunting. Raspberry Pi is an amazing little computer with tons of potential. And Learn Raspberry Pi with Linux can be your first step in unlocking that potential.
What you’ll learn
How to get online with Raspberry Pi
How to customize your Pi’s desktop environment
Essential commands for putting your Pi to work
Basic network services – the power behind what Pi can do
How to make your Pi totally wireless by removing all the cables
How to turn your Pi into your own personal web server
How to turn your Pi into a spy
How to turn your Pi into a media center
Who this book is for
Raspberry Pi users who are new to Linux and the Linux command line.
I rate this book an 8 out of 10 and highly recommend it to anyone looking to make a project with a Raspberry Pi.
I think a review in CycleWorld led me to buy this hardcover book; it tuned out to be the most disappointing “motorcycle” book I have ever read.
The full title is “There & Back Again To See How Far It Is: Cultural Observations of an Englishman Aboard a Harley-Davidson Motorcycle Across Small-Town America”
Just a really boring read with lots of semi-interesting tid-bits pulled from Wikipedia and Google Maps. I found very few “Cultural Observations”, information about a “Harley Davidson Motorcycle”, or feel that the author and his wife had travelled very far throughout the book.
Take a pass on this one.
I rate this book a 1 out of 10 and do not recommend it to anyone.
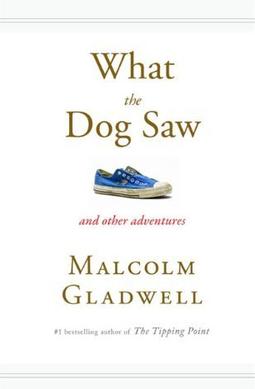
I was looking for a book to read and found What the Dog Saw on the office bookshelf. I have really liked the Malcolm Gladwell books I read in the past so decided to give it a try.
This book is a collection of articles that Malcolm Gladwell wrote for the New Yorker covering a wide variety of topics.
My favorite articles include Cesar Millan the “Dog Whisperer”, the story of Grey Poupon, and Enron.
Gladwell’s writing is superb, witty, and never strays to far from the point even when it is taking a winding path to get there.
What is the difference between choking and panicking? Why are there dozens of varieties of mustard-but only one variety of ketchup? What do football players teach us about how to hire teachers? What does hair dye tell us about the history of the 20th century?
Here is the bittersweet tale of the inventor of the birth control pill, and the dazzling inventions of the pasta sauce pioneer Howard Moscowitz. Gladwell sits with Ron Popeil, the king of the American kitchen, as he sells rotisserie ovens, and divines the secrets of Cesar Millan, the “dog whisperer” who can calm savage animals with the touch of his hand. He explores intelligence tests and ethnic profiling and “hindsight bias” and why it was that everyone in Silicon Valley once tripped over themselves to hire the same college graduate.
“Good writing,” Gladwell says in his preface, “does not succeed or fail on the strength of its ability to persuade. It succeeds or fails on the strength of its ability to engage you, to make you think, to give you a glimpse into someone else’s head.” What the Dog Saw is yet another example of the buoyant spirit and unflagging curiosity that have made Malcolm Gladwell our most brilliant investigator of the hidden extraordinary.
I rate What the Dog Saw a 9 out of 10 and recommend it to anyone.
The Lost Fleet is a science fiction series written by John G. Hemry writing as Jack Campbell and consists of 6 novels centered around Captain “Black Jack” Geary and the Alliance Fleet. This is good old military science fiction space war stuff.
I listened to these novels as audiobooks from Audible. Christian Rummel does a great job narrating all 6 of the novels and brings all of the characters to life. When adding up the playtime of all six novels you get 60 hours of space battles, political infighting, and military atmosphere.
This is not my ordinary type of reading, I usually go with something lighter, but The Lost Fleet had been recommended to me so many times that I couldn’t ignore it any longer. I am glad I finally picked it up, they are pretty great for what they are. Military space battles with some real military thought put into them.
I listened to all 6 of them one after the other, just couldn’t stop myself. And now I am on to Jack Campbell’s Beyond the Frontier series.
The Alliance has been fighting the Syndics for a century, and losing badly. Now its fleet is crippled and stranded in enemy territory. Their only hope is a man who has emerged from a century-long hibernation to find he has been heroically idealized beyond belief.
Captain John “Black Jack” Geary’s legendary exploits are known to every schoolchild. Revered for his heroic “last stand” in the early days of the war, he was presumed dead. But a century later, Geary miraculously returns from survival hibernation and reluctantly takes command of the Alliance fleet as it faces annihilation by the Syndics.
Appalled by the hero-worship around him, Geary is nevertheless a man who will do his duty. And he knows that bringing the stolen Syndic hypernet key safely home is the Alliance’s one chance to win the war. But to do that, Geary will have to live up to the impossibly heroic “Black Jack” legend.
I rate The Lost Fleet series an 8 out of 10 and recommend it to anyone who loves science fiction and has a taste for the military.
How to make a new folder icon for your MAME games is pretty easy with a handful of steps. This is the process I followed; there are other ways to do it using other tools. I used Preview, Adobe Photoshop, and Xcode’s Icon Utility.
Step 1: Get the Icons
I like JohanChalibert’s OS X Yosemite Icon set that he has posted on Deviant Art, but you could search around a bit and find many different icon sets that would be a great place to start.
Download the icon set, unzip it, take a moment to read the readme file, and then find the folder icon you want to use as a starting point, I used GenericFolderIcon.icns. Right-click the Icns file and open it in Preview.
Step 2: Export the Base Icon
Preview InpectorNow that you have the icon set open in preview you can see that it is made up of 10 different graphics. By opening the Inspector (Tools > Show Inspector or Command i) you can see the details for each graphic, like the first graphic is 1024 x 1024 pixels in size at 144 dpi.
Export As…Right-click the “1” graphic and choose Export As…, change the Format to PNG making sure the Alpha checkbox is checked. I kept the default name of GenericFolderIcon.png.
Step 3: Editing the Graphics
Now I download the super large version of the MAME logo from MAME Dev. This is what I want to put on the front of my folder icon.
Open both the GenericFolderIcon.png and the MAMELogoTM.jpg files in Photoshop.
On the MAME logo in the Layers panel click the padlock icon to convert the background to a regular layer.
Using the Magic Wand tool with a Tolerance of 12, Anti-alias checked, and Contiguous unchecked click the black background of the logo.
Delete BackgroundClick the Delete key to remove that black background then Command D to cancel the selection.
Adjust LevelsOpen the Levels panel (Image > Adjustments > Levels… or Command L) and under Output Levels make both sides “0” which will make the entire logo solid black.
Pasted LogoThen Select All (Command A), Copy (Command C), then switch to the GenericFolderIcon graphic and Paste (Command V).
Tranform LogoInitially the MAME logo will be huge compared to the folder so you will need to transform it to fie. Transform (Command T) then while holding down the shift key to keep the ratio of the logo locked start resizing the logo until it looks good to you.
In the Layer panel switch the mode to Overlay.
Create an “fx” layer with an Inner Shadow, I like the settings Blend Mode: Mulitply, Opacity: 36%, Angle: 128, Distance: 9px, Choke: 0, Size: 21px. Play with it until you find something you like.
Adjust LogoFor my tastes the MAME logo is still too strong, I want it to more closely match the Apple Applications folder Icon. So back in the Layers I turn the Opacity of the logo layer down to 38%.
Save that PSD file early and often so you have something to go back too if there are any problems or you want to make adjustments later.
The “2x” images are saved at 144 DPI while the others are saved at 72 DPI.
It can get a bit confusing at this point, but keep in mind that [email protected] is really 256×256 at a resolution of 144 DPI while icon_256x256.png is 256×256 at a resolution of 72 DPI.
I make a Duplicate (Image > Duplicate) of the image so that I wont accidentally overwrite my full-sized PSD file.
Image Size 512@2xIn the Image Size panel (Image > Image Size… or Command Option I) adjust the resolution to 1024×1024 at 144 DPI.
Then Save for Web (File > Save for Web… or Command Option Shift S) with the settings of PNG-24 and Transparency Checked.
Click Save and in the Save Optimized As dialog box make a new folder naming it “MAMEFolderIcon.iconset”. The “.iconset” portion is important later.
Image Size 512Back to the Image Size panel adjust the size to 72 DPI Resolution and sized 512×512 (easier to make the changes in that order as adjusting the resolution will change the width and height). Resample should be set to “Automatic” or “Bicubic Sharper (reduction)”.
Save this one as icon_512x512.png.
Finished FilesNow do that another 8 times adjusting the size and saving based on the file names above.
As the icon graphic gets smaller you could change it up to keep it distinguishable from other icons. Instead of using the full MAME logo you could use just an “M” or you could darken the logo, or anything else you can think of.
Step 5: Building the Icon Set
I am using the Icon Utilities tool that comes with Xcode. There are a lot of icon tools out there, the App Store is full of them, but I happen to have Xcode installed and decided this was the easiest way for me to create the finished icon set.
Open the Terminal app and change the directory to where you have the MAMEFolderIcon.iconset saved. For me that was “cd /Users/dnelson/Documents/Folder\ Icon\ Post/”
Then run the Icon Utilities app “iconutil -c icns MAMEFolderIcon.iconset”
And BANG! You have your very own MAMEFolderIcon.icns icon set.
Step 6: Put your New Icon Set to Use
Find the folder you want to give your new Icon Set to and get ready for the magic.
Select the folder, click on it once, than then Get Info (right-click and choose Get Info or Command I).
Drag-and-DropNow drag-and-drop you new icon set on top of the folder icon at the top of the Get Info dialog box.
Updated FolderAnd you are done!
It is a tedious process, but it is nice to have custom icons like this, especially for folders in the Doc. This process will also work for making icons for your game launching files.
Sometimes you want to be able to launch a game by double-clicking an icon rather than going through MAME’s interface or using the Terminal. This method has the added benefit of letting you easily launch MAME with various options.
We are going to write a small shell script, save it as a command file, and make it executable.
If you have followed the directions in my previous post “MAME on Mac OSX Yosemite” you can follow these instructions exactly, if you have made changes or modified any steps, keep that in mind while working through these steps.
First off we write the shell script.
1. Open the Documents directory and create a new folder named “MAME Games”.
2. Open Applications > TextEdit and click Format > Make Plain Text
3. On the first line of the document enter “#!/usr/bin/env bash”. This is known as a shebang and tells the computer that we want to use the Bash shell to run our script.
4. Then for readablility’s sake skip a line and enter “cd ~/Documents/mame” on the next line. This changes the directory to your mame folder inside of your Documents folder.
5. On the last line enter “./mame64 robotbwl” which launches the MAME application and loads the Robot Bowl ROM.
6. Now save the file naming it “Robot Bowl.command”. The filename extension of “command” tells Mac OSX that this is a Terminal shell script.
We have created our script now we have to give it permission to be executable.
1. Open the Terminal app and end enter “chmod +x ~/Documents/MAME\ Games/Robot\ Bowl.command”, this modifies the permissions of the “Robot Bowl.command” file by adding the Executebale for everyone permissions to it.
2. NOTE: The back slash “\” in the code escapes the spaces in the directory path and file names, without those back slashes the code will not work.
That is all there is to it, you should now be able to double click on the Robot Bowl file to launch MAME and the Robot Bowl game.
Options
Now we are going to create a file that will launch the Robot Bowl game with the screen much brighter than normal. This can be really handy if you have a screen or a game that is dark.
1. Copy the Robot Bowl file we created above and name it “Robot Bowl Bright”. By copying the Robot Bowl file the copied file will have the original’s executable permissions.
2. Open the Robot Bowl Bright file in TextEdit and add the brightness option to it by changing the last line to be “./mame64 robotbwl -brightness 1.5” and save it.
Now launch the new Robot Bowl Bright file and you can see how much brighter it is, the background has become gray. Hit the Escape (esc) key to quit and launch the original Robot Bowl file and you should see that the background is black when launching the game from that file.
In the docs directory there is a config.txt file that contains many other options you can use to configure your launchers. The ones you will probably use most often are the joystick options.
The Dock
To make launching games even easier you can drag the MAME Games folder onto the right-hand side of the Dock by the trashcan. I don’t like the default view of folders in the Dock so I right-click the folder and choose “Display as Folder” and “View content as List”. Now I can click the folder in the dock and choose a game from the list.
You could get creative with this and have a different folder for different types of games or with different options enabled for the games.
Multiple Arcade Machine Emulator (MAME) is a free and open source application used as a reference of the inner workings of arcade gaming systems. A side effect of this is that MAME can be used to play old arcade games if you can find the games. MAME uses data dumps from the Read Only Memory chips (ROMs) that were used in the original arcade games.
You will have to use the terminal app and the console to get MAME working, but it is very easy following the steps below. You will also need admin privileges on the computer, this is not absolutely necessary to run MAME, but that is how I am going to cover it here.
These instructions are for SDLMAME version 0.156 64-bit which was released on November 28, 2014.
Follow the instructions at the top of the page and install the “SDL runtime library”
From the SDL website download SDL2-2.0.3.dmg or the latest version.
Double-click the SDL2-2.0.3.dmg file which will mount it as a drive.
Open the Terminal application Applications > Utilities > Terminal
Enter “open /Library/Frameworks” into the terminal window, this will open a window for the Frameworks directory
Drag the “SDL2.framework” file from the SDL2 window into the “Frameworks” window, you may be prompted to enter an Admin username and password to authenticate your desire to modify the Frameworks directory. Click “Authenticate” and then enter an Admin Username and Password.
Back at the SDLMAME page click on the “SDLMAME v0.156 64-bit” link and save the file to your computer. I am placing it in the “Documents” directory.
Double-click the zip file, when finished you should now have a folder named “mame0156-64bit”, now rename this folder “mame”, keep in mind that case counts so make sure the folder name is all lower-case.
Open the “mame” folder and take a look at the contents
Over in the Terminal app, enter “cd ~/Documents/mame” and then “ls -al” to double-check that you are in the right directory
Now to create the MAME configuration file enter “./mame64 -createconfig” this will create a “mame.ini” file in the “mame” directory
Click on “I understand…” and download the game to the Documents/mame/roms directory
WARNING: ROMs are saved as zip files and they should stay zipped. MAME will handle unzipping them and using the contents inside. If you use a web browser that automatically unzips files when you download them you will need to change that setting to preserve the original files.
In Yosemite the keyboard does not use the function keys on as F-1 through F19 the way other operating systems do, they are assigned all kinds of other functions. You can hold the “Function (fn)” key down everytime you want to use a function key or you can open the System Preferences > Keyboard and check the “Use all F1, F2, etc. keys as standard function keys” box. If you check this box you can use the “fn” key to utilize the special functions of those keys. That is my preferred method.
Now to launch MAMA and give Robot Bowl a try
In the Terminal enter “./mame64”
Use the arrow keys to select “robotbwl Robot Bowl” and tap Enter
You may see a screen warning about using ROMs that you are not legally entitled to play, give it a quick read and know that you have been given permission by H.R. Kaufmann, president of Xidy, the original ROM images for Robot Bowl have been made available for free, non-commercial use. On your keyboard the left then right arrows to move on.
Then you may see a message that there are known problems with this game. The sound emulation isn’t 100% accurate. Click the left then right arrow keys again to move on.
Now the game should be playing its attract animation of a stick figure coming out to bowl.
Tap the “Tab” key to bring up the in-game configuration menu and choose “Input (this Game)”
NOTE: I prefer not to change the “Input (general)” controls from the default. By keeping the general defaults tutorials and other help I may use in the future will work without me having to translate which keys to press.
Controls
This is really cool, when you look at the input controls for a specific game, it shows ALL of the control options for that game making it very easy to learn how to play that game and re-configure the buttons and controls for it.
For Robot Bowl the default controls are:
1 Player Start: 1
Coin 1: 5
P1 Left Button: Left arrow key
P1 Right Button: Right arrow key
P1 Button 1: Left Control key or mouse button 1 (left mouse button)
P1 Button 2: Left Alt key or muse button 3 (right mouse button)
Hook Left: Z key
Hook Right: X key
You can use the arrow keys to navigate to any of these and change them by tapping the Enter key then tapping the key you want to use; you can have more than one key assigned to a single control.
And that is it; you now have MAME up and running on your Mac OSX Yosemite computer.
You can find a lot more information about customizing MAME in the ~/Documents/mame/docs directory, especially in the config.txt file.
I really like the Borderlands series of games, they are the right combination of first-person shooter (FPS), customizability, and goofy humor. The mechanics have always been good and it has been much more fun than frustrating.
The story lines in the Borderlands series do tend to be thin, this is not epic story telling by any means, but there is a story and it stays pretty consistent throughout the franchise, and I really enjoy it.
Borderlands: The Pre-Sequel is the third update to the franchise. There are 3 main games, Borderlands, Borderlands 2, and now Borderlands: The Pre-Sequel. But each of these have a lot of downloadable content available that greatly extend the gameplay.
So far I have made my way through The Pre-Sequel with Nisha bringing her up to level 50 and now I am working my way through with Jack from the most recent DLC.
These games are solid fun if you enjoy FPS and the skill trees give you the opportunity to play the game using many different styles of play.
My only real complain right now is that the Mac and PC updates are not in sync so as a Mac player am having a tough time to find groups to play with. That is very frustrating as Jack is the perfect team player and should be most enjoyable with a full group. I think a group of 4 jacks would be a blast.
I rate Borderlands: The Pre-Sequel an 8 out of 10 and recommend it to anyone looking for a fun FPS to play.
 To legally use a 5.8GHz video transmitter in the U.S. you need at least a Technician Amateur Radio license. It is not a hard test, but I wanted some study aids to make sure I only had to take the test once.
 I really love the characters and world that Larry Correia has created with the Grimnoir Chronicles and Bronson Pinchot has done an amazing job bringing them to life.
 I love me some Veronica Mars, it was one of the few non-sci-fi shows I watched in real time. Kristen Bell and her friends just work for me.
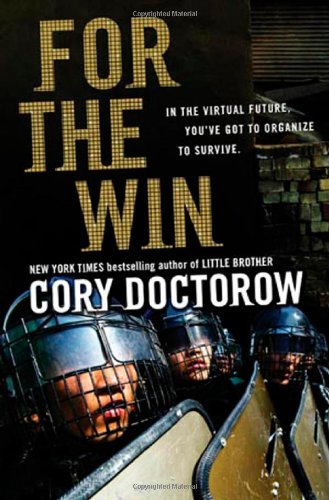 Changing pace yet again I decided to binge on some Cory Doctorow goodness. If you don’t know who he is check out
  Freedom is book 2 in the Daemon series of novels. It continues right where Daemon left off, more of the same.
 I don’t remember how this series by Daniel Suarez came to my attention. It could have been as simple as the title of the first book, “Daemon”, or my proclivity for techno-thrillers that get most of it right.
 This is the Raspberry Pi book I have been looking for. Instead of trying to push some advanced scripting language or Linux distribution, this book shows you how to use the most widely used distribution, Raspbian, and good old Bash scripts to do useful things with a Raspberry Pi.


